Moving into a freshly renovated Essex property or preparing to vacate a tenancy should feel exciting, yet the reality of deep cleaning often brings stress and uncertainty. Without a clear workflow, you risk missing critical areas, damaging surfaces with incorrect products, or spending far more time than necessary. This guide walks you through a proven step-by-step deep cleaning workflow specifically designed for Essex homes, ensuring every corner meets professional standards whilst protecting your deposit or property value.
Table of Contents
- Key takeaways
- Preparing for a deep clean in Essex homes
- Executing the deep cleaning process step-by-step
- Common mistakes and troubleshooting during deep cleaning
- Verifying cleanliness and final touches for deep cleaning
- Discover professional deep cleaning services in Essex
- Frequently asked questions
Key Takeaways
| Point | Details |
|---|---|
| Detailed preparation | Detailed preparation with a room by room plan and checklist helps identify areas needing extra attention and ensures you have the right tools. |
| Professional tools and eco friendly products | Use professional grade tools and eco friendly products to work efficiently and protect surfaces. |
| Room by room approach | A room by room approach and checklist prevent gaps and ensure systematic coverage. |
| Dry weather scheduling | Plan the deep clean for dry weather to aid ventilation and reduce moisture related problems. |
Preparing for a deep clean in Essex homes
Successful deep cleaning starts long before you pick up a cloth. Effective deep cleaning begins with detailed preparation and use of appropriate professional tools, ensuring you work efficiently without backtracking or discovering missing supplies mid-task.
Start by walking through every room with a notepad, documenting areas requiring extra attention such as stubborn stains, mould patches, or heavy limescale buildup. This assessment reveals whether you need specialised products beyond standard cleaners. Essex properties, particularly older builds, often present unique challenges like single-glazed windows prone to condensation damage or period features requiring gentle treatment.
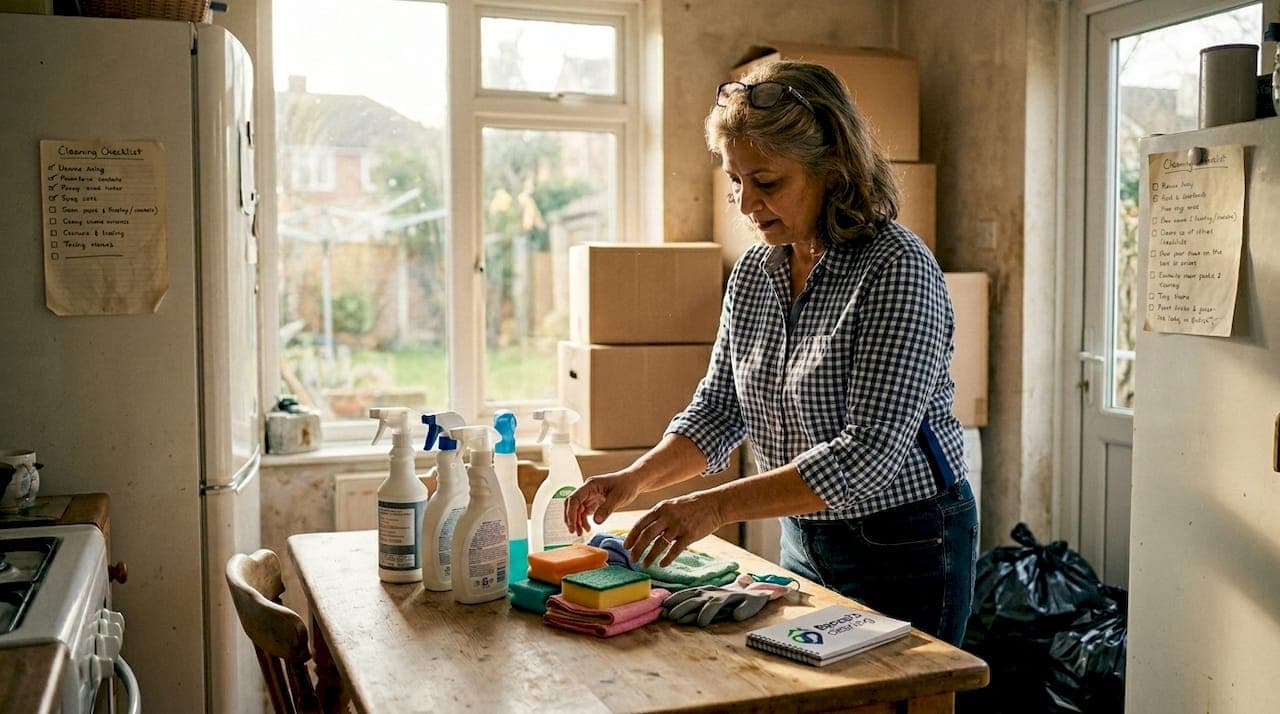
Gather your cleaning arsenal before beginning:
- Microfibre cloths in multiple colours to prevent cross-contamination between bathrooms and kitchens
- Heavy-duty scrubbing brushes, sponges, and scouring pads for different surface types
- Professional-grade vacuum with attachments for upholstery, crevices, and hard floors
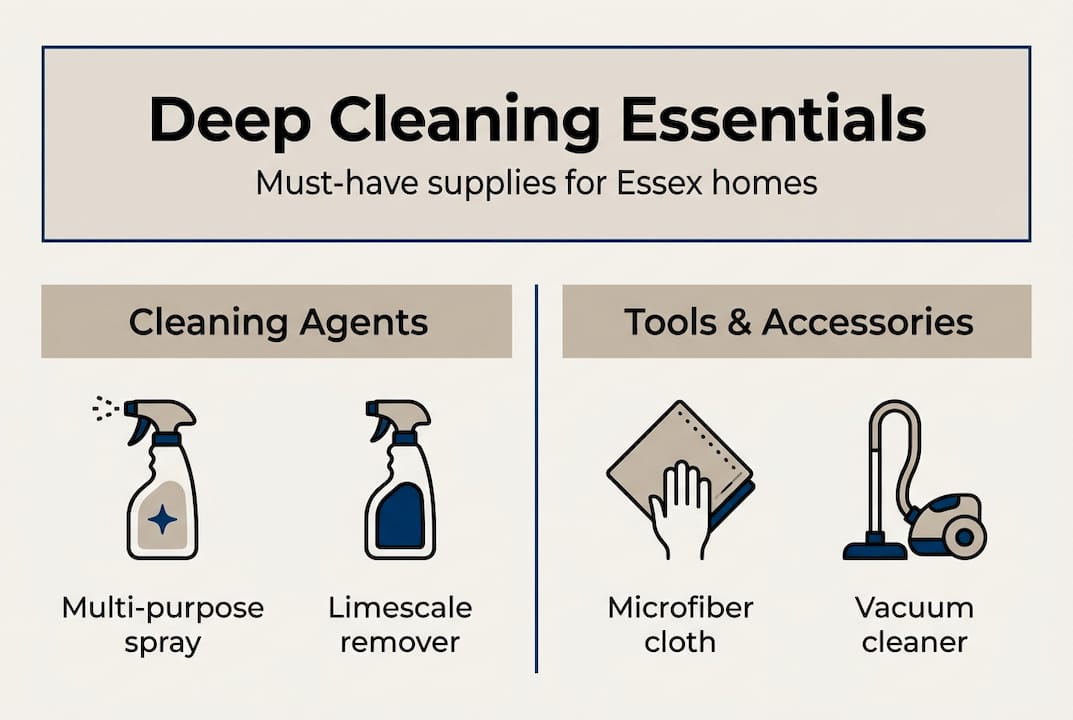
- Eco-friendly multi-surface cleaner, degreaser, limescale remover, and disinfectant
- Rubber gloves, protective eyewear, and dust masks for safety during intensive cleaning
- Extension poles for reaching high areas without ladders
- Buckets, mop, and squeegee for floors and windows
| Supply category | Essential items | Purpose |
|---|---|---|
| Cleaning agents | Multi-surface spray, degreaser, limescale remover, disinfectant | Tackle different soil types effectively |
| Tools | Microfibre cloths, brushes, vacuum, mop | Physical cleaning action |
| Safety equipment | Gloves, masks, eyewear | Protect from chemicals and dust |
| Specialised | Carpet cleaner, upholstery foam, oven cleaner | Address specific deep cleaning needs |
Create a room-by-room checklist that breaks down tasks into manageable chunks. This prevents overwhelm and ensures systematic coverage. For a typical three-bedroom Essex terrace, allocate roughly two hours per bedroom, three hours for the kitchen, two hours for the main bathroom, and one hour each for living areas and hallways.
Pro Tip: Schedule your deep clean during dry weather when you can open windows for ventilation without worrying about rain damage. Essex's coastal climate means moisture management is crucial during intensive cleaning to prevent mould regrowth.
Check you have proper disposal bags for rubbish accumulated during cleaning, and clear pathways between rooms so you can move equipment freely. Remove or cover furniture you cannot move to protect it from cleaning splashes. This preparation phase typically takes 30 to 45 minutes but saves hours during execution by eliminating interruptions.
Executing the deep cleaning process step-by-step
With preparation complete, systematic execution ensures thorough coverage without wasted effort. A step-by-step room-wise workflow ensures every area is cleaned comprehensively without overlooking corners, following professional standards used by experienced cleaners across Essex.
Always work from top to bottom within each room, allowing dust and debris to fall onto surfaces you will clean later. This principle prevents rework and maximises efficiency throughout your property.
- Begin with ceiling corners and light fixtures, removing cobwebs and dust using an extension pole with microfibre attachment
- Clean walls, switches, and sockets with appropriate cleaner, paying attention to marks around handles and high-traffic areas
- Tackle windows inside and out, using squeegee technique for streak-free results
- Deep clean all furniture surfaces, including tops, sides, and undersides where dust accumulates
- Address skirting boards and door frames with damp cloth, removing built-up grime
- Finish with floor cleaning, vacuuming thoroughly before mopping hard surfaces
Kitchens demand extra attention due to grease accumulation and food residue. Start by emptying and cleaning inside all cupboards and drawers, checking for expired items or spills. Remove and soak oven racks, hob grates, and extractor fan filters whilst you tackle other surfaces. Apply degreaser to splashbacks, tiles, and the cooker hood, allowing dwell time before scrubbing.
Bathrooms require specialised approach focusing on limescale, mould, and soap scum. Spray limescale remover on taps, showerheads, and tiles, leaving it to work whilst you clean the toilet thoroughly inside and out. Address grouting with dedicated brush, applying mould remover to affected areas. Essex's hard water means limescale builds rapidly, so intensive treatment here makes significant visual difference.
For upholstery and carpet cleaning, vacuum thoroughly first to remove loose debris, then treat stains with appropriate spot cleaner. Use carpet cleaning machine or foam for deep treatment, ensuring adequate drying time before replacing furniture. This step is particularly important for deposit return as carpets show wear most obviously.

Pro Tip: Take before photos of challenging areas like grouting or stubborn stains. If they do not fully remove despite proper treatment, these images provide evidence you attempted thorough cleaning, which can protect your deposit during disputes.
Maintain your workflow momentum by completing one room fully before moving to the next. This psychological approach provides satisfaction from visible progress and prevents the overwhelming feeling of half-finished tasks throughout the property. Set a timer for each room based on your initial plan to stay on schedule.
Common mistakes and troubleshooting during deep cleaning
Even with careful planning, certain pitfalls can undermine your deep cleaning efforts or cause unintended damage. Awareness of common pitfalls, such as skipping detail areas or using incorrect cleaning agents, improves quality and protects property surfaces.
Many people rush through ventilation grilles, radiator backs, and inside cupboards, assuming these hidden areas do not matter. Estate agents and landlords specifically check these spots during inspections because they reveal whether a clean was truly deep or merely superficial. Allocate time to pull out appliances, clean behind radiators, and wipe inside every cupboard and drawer.
Using incorrect products causes the most expensive mistakes:
- Bleach on natural stone damages the surface permanently
- Abrasive cleaners scratch stainless steel appliances
- Acidic cleaners on marble worktops cause etching
- Mixing cleaning chemicals creates dangerous fumes
- Excessive water on wooden floors leads to warping
Always test new products on inconspicuous areas first, particularly in older Essex properties with period features or unusual materials. When uncertain about a surface, use pH-neutral cleaner which works safely on most materials without risk.
"The difference between adequate and exceptional deep cleaning lies in attention to detail areas most people overlook. Professional cleaners know that door edges, light switch plates, and internal window sills reveal the true standard of a clean."
Another frequent error involves inadequate ventilation during cleaning. Chemical fumes accumulate quickly in enclosed spaces, causing headaches and respiratory irritation. Open windows in each room before starting, even in cold weather, and use extractor fans where available. This also accelerates drying time for wet surfaces.
Rushing the process leads to missed spots and substandard results. If your initial time estimate proves insufficient, extend your schedule rather than cutting corners. A thorough clean completed over two days beats a rushed job that requires redoing failed areas.
Pro Tip: View each surface from multiple angles and lighting conditions during cleaning. Grease streaks, watermarks, and dust often become visible only when light hits at certain angles. Crouch down to check skirting boards and stand on a step to inspect high shelves properly.
When you encounter stubborn stains that resist initial treatment, avoid aggressive scrubbing that damages surfaces. Instead, reapply cleaner and allow longer dwell time for chemical action to break down the soil. Patience often achieves what force cannot.
Verifying cleanliness and final touches for deep cleaning
The execution phase may feel complete, but final thorough inspections and finishing touches elevate the clean from good to professional standard. This verification ensures you meet the exacting standards expected for deposit return or property handover in Essex.
Conduct your final inspection systematically using the same room-by-room approach as your initial clean. Check every item on your preparation checklist, physically touching surfaces to confirm they are clean and dry rather than relying on visual assessment alone. Sticky residue, damp patches, or rough textures indicate areas requiring additional attention.
| Room | Before deep clean | After deep clean | Verification check |
|---|---|---|---|
| Kitchen | Grease buildup, stained surfaces, dirty appliances | Sparkling surfaces, clean appliances inside and out | Run finger along top of cupboards, check inside oven |
| Bathroom | Limescale, mould, soap scum | Gleaming fixtures, fresh grouting, clear drains | Inspect tile grouting, check under sink rim |
| Bedrooms | Dusty surfaces, marked walls, stained carpets | Clean walls, fresh carpets, dust-free fixtures | Check skirting tops, window sills, light fittings |
| Living areas | General dust, marked switches, dirty windows | Streak-free windows, clean switches, fresh atmosphere | View windows from outside, check radiator backs |
Pay particular attention to these commonly missed areas during verification:
- Internal window frames and sills where condensation causes buildup
- Top edges of doors and door frames
- Light switches and electrical socket faces
- Radiator surfaces and the wall behind them
- Kitchen cupboard door edges and handles
- Bathroom extractor fan grilles
- Stair spindles and handrails
Add finishing touches that create immediate positive impression. Place fresh bin liners in all waste bins, ensuring they are clean inside first. Arrange furniture neatly and ensure cushions sit properly on sofas. Wipe down front door inside and out, as this creates the crucial first impression during viewings or inspections.
Consider subtle deodorising to leave a fresh, clean scent without overwhelming artificial fragrance. Open windows for final airing, or use light essential oil diffuser in living areas. Avoid heavy air fresheners that can raise suspicion about masked odours.
Pro Tip: Photograph every room from multiple angles once cleaning is complete. These images provide indisputable evidence of the property's condition at handover, protecting you if disputes arise later about deposit deductions or cleaning standards.
Review your work during different times of day if possible. Natural daylight reveals issues artificial lighting might hide, whilst evening inspection with lights on shows how the property presents during typical viewing hours. This dual perspective catches any remaining imperfections before official handover.
Discover professional deep cleaning services in Essex
Whilst this comprehensive workflow equips you to tackle deep cleaning independently, professional services offer guaranteed results without the physical effort and time investment. After understanding the intensive work involved, many Essex residents choose expert help for peace of mind, particularly when facing tight moving deadlines or challenging post-renovation cleanup.

Bansal's Cleaning specialises in thorough deep cleans tailored for Essex properties, whether you need regular domestic cleaning services to maintain standards or intensive one-off treatments. Our experienced team handles everything from upholstery and carpet cleaning to complete property preparation, using professional-grade equipment and eco-friendly products that deliver superior results.
For tenants facing end-of-tenancy requirements, our Essex end of tenancy cleaning service includes deposit-back guarantee, removing the stress of meeting landlord expectations. We understand local estate agent standards and ensure every detail meets inspection criteria, protecting your financial interests whilst you focus on your move.
Frequently asked questions
What is the best deep cleaning workflow for Essex homes?
The most effective workflow follows three core stages: thorough preparation including supply gathering and property assessment, systematic execution working top to bottom in each room, and rigorous verification with finishing touches. This structured approach prevents missed areas and ensures professional-standard results. For optimal outcomes, especially in challenging situations like post-renovation cleanup, consider professional house cleaning services that guarantee comprehensive coverage.
How often should deep cleaning be done in an Essex residence?
Typical homes benefit from deep cleaning twice yearly, ideally in spring and autumn, to maintain optimal hygiene and prevent buildup that becomes harder to remove over time. However, specific circumstances demand immediate deep cleaning, including after renovations, before moving in or out, following illness, or when preparing property for sale. Regular domestic cleaning between deep cleans maintains standards and reduces the intensity required during periodic thorough treatments.
What tools and products are essential for an effective deep clean?
Using professional-grade and eco-friendly products improves cleaning effectiveness and safety. Essential items include microfibre cloths in multiple colours, heavy-duty vacuum with attachments, scrubbing brushes of various sizes, and specialised cleaners for different surfaces such as degreaser, limescale remover, and disinfectant. Personal protective equipment including gloves, masks, and eyewear protects you during intensive cleaning. Quality tools make significant difference in results and reduce physical effort required.
Can I do deep cleaning myself or should I hire professionals?
DIY deep cleaning is achievable with sufficient time, proper tools, and physical capability, making it cost-effective for those with flexible schedules. However, professional cleaning services in Essex offer distinct advantages including guaranteed results, specialised equipment, expert knowledge of different surfaces, and significant time savings. For end-of-tenancy situations where deposit return depends on cleanliness standards, or after major renovations requiring intensive treatment, professional services provide peace of mind and often prove more economical than failed DIY attempts requiring repetition.